Bread is too soft to slice: Freeze it and slice it frozen.
Bread Stale: Sprinkle it with a small amount of water, put it in foil, and bake in an oven at moderate heat for about ten minutes.
Cake Stuck to Pan: Let it sit until it is a little cooler, and then try again. If it's already cold, reheat for a minute or two.
Cheese tough or rubbery after cooking: Blend in a blender or food processor at low speed for a minute or two, then cook slowly.
Coffee or broth cloudy: add eggshells.
Coffee overcooked: Add a pinch of salt
Dough is lumpy: Add more liquid and pound the dough thoroughly.
Dough won't rise: Put the bowl of dough in a warmer place - in an oven, for instance, with a pilot light (do not turn the oven on). You could also mix a bit more yeast in ¼-cup warm water and knead into dough.
Dough won't shape: Let it rest for 15 minutes.
Eggs crack when cooking: Put in 1 teaspoonful of salt and a bit of lemon or vinegar into the water to keep whites from oozing out of the shell.
Egg whites won't whip: Add a bit of baking soda or salt.
Fudge hard: Add a tablespoon of milk and 2-3 tablespoonfuls of corn syrup and beat, then pour. Put in an airtight container for 24 hours.
Gelatin stuck in mold: Dip the mold in hot water, but not so the gelatin is touched by the water, for just a few seconds. Put the mold on a plate, turn it upside down and shake.
Gravy gray: Add red currant jelly, soy sauce, a bit of sherry, meat extract, or 1 teaspoon instant coffee.
Gravy lumpy: Beat it with eggbeater or wire whisk. Strain it.
Gravy salty: Make more. Sometimes adding a bit of brown sugar helps. Cook small pieces of potato into the gravy.
Ham salty: Soak slices in milk for 15 minutes to a half-hour. Wash off.
Icing sugared: Add a bit of vinegar and keep cooking.
Lemon hard: Heat it for 5 minutes in boiling water or for 15 seconds in a microwave on HIGH, then try juicing it.
Meat burned: Cut off burned parts, cube and sauce the rest. Serve over pasta.
Pasta stuck together: Put back in boiling water with a tablespoon or so of oil in it.
Pie dough burning on edge: Cover edge with aluminum foil.
Popcorn won't pop: Soak corn in water for 5 minutes, dry off and try again. For very recalcitrant corn, freeze overnight and pop while frozen.
Rice burned: Get it off the flame, then put a piece of bread on top of it, cover for 5 minutes.
Scummy stock: Add leek tops and tomato peels, which absorb the scum.
Soup too salty: Slice in potato, simmer until potato turns translucent, then lift potato out.
Stew meat tough: if you haven't had the time to let the stew continue cooking under gentle heat, add a few tomatoes or a teaspoon of sugar to tenderize it.
Vegetable old: To pep them up, add a pinch or two of sugar and a little salt to the cooking water.
Vegetables overcooked: Puree them. Or make a cream soup of them Or put them in an oven-safe dish, cover them with bread crumbs and grated Parmesan cheese, and broil for a couple of minutes.
Vegetables too salty: Pour the water out, rinse them off, and return them to the stove in new water. If you are already done, wash in hot water.
Whipping cream won't whip: chill everything (bowl, cream, beaters) and try again. If that fails, add an unbeaten egg white or 3-4 drops of lemon juice and whip as hard as you can.
Fixing Common Cooking Mistakes
Discovering Smoked Barbecue - The Ceramic Kamado Cooker - What is It?
If you are a barbecue aficionado, perhaps you have heard of the Kamado Cooker. Perhaps not. The Kamado type cooker is a heavy ceramic vessel used both as a smoker and and as a grill. The "Big Green Egg" is the name brand of one type of Kamado Cooker. there are other brands to choose from. They all work basically the same way, and are really just a certain style of a vertical smoker.
There are generally three types of smokers to choose from when cooking barbecue. One is the offset smoker, which has a fire box set off from the smoke chamber. the meat sits on top of racks in the smoke chamber. Smoke and heat enter the smoke chamber, flow around the meat, and exit through a chimney system.
The next style of barbecue smoker is a kettle grill/smoker. Think "Weber Kettle Grill". This type of grill can be set-up for use as an indirect smoker. To use as a smoker, charcoal is piled up to the sides of the kettle, and the meat is placed in the center of the grill, not directly over the hot coals. Smoke from the coals goes around the meat giving it that smokey good flavor before exiting the little vents in the top of the lid. This type of smoker, low tech as it is, will turn out fine tasting barbecue.
Finally, the last style of barbecue smoker is a vertical smoker. In a vertical smoker, the fire is built in the bottom of the single chamber, many times there is a water pan directly over the fire, and the meat is smoked on racks located vertically above the fire in the bottom of the chamber. The smoke and heat travels upwards, around the meat cooking it and giving it that smoked barbecue flavor before exiting through the vents on top of the unit. A Kamado smoker is simply a specialized type of a vertical smoker.
The Kamado smoker is made out of heavy ceramic material, about an inch thick. The benefits of the Kamado smoker is that the fire can easily be maintained at very low temperatures which is good for smoking meat "low and slow." Also, because of the insulation properties of the ceramic material, a small amount of charcoal fuel is used while cooking. If not used as a smoker, the Kamado makes an excellent grill, achieving temperatures as high as 725 degrees. It can be used for many types of cooking, including baking of pizza's.
Microwaved Eggs: How to cook eggs in the microwave oven?
A friend shows me how to cook eggs in the microwave oven. (Language: Portuguese, 2008) (Como fazer um ovo na microondas?)
Bone Appetit Mon Cheri
Dan Mej Lou Mian (Daniel Mejloumian) Loves his food so much, so he eats and eats and eats and eats... till he fall asleep with the milk bottle half fool still.
Kitchen Sink Dramas
An animation by Joe Brown and Tom Lambert. We interviewed over 50 kitchen staff, teachers and pupils on what they thought about school food. We animated our favorites. Please Comment and Rate. Thanks. More films: www.abingdonfilmunit.com
Chicken Tender Recipes - Easy & Quick To Prepare!
These chicken tender recipes are easy, quick and delicious. Just check these out and I'm sure you'll be amazingly surprised.
So put your hat on and get ready for some quick easy chicken tender recipes:
>> Turkey or Chicken Tenders
1 1/4 lb Fresh turkey tenderloin Or boneless chicken breast
1 1/4 c Divided oat bran cereal
1 t Salt
1/2 ts Pepper
2 lg Egg whites
2 tb Lowfat evaporated milk
1 t Paprika
1/2 c Peanut oil
Cut turkey tenderloins or chicken breasts into 6 slices by cutting cross the turkey carefully with sharp knife. Pound tenders to 1/4 inch thickness. Slit around edges to keep from curling. Blend 1/2 cup of
the oat bran cereal with salt and pepper and coat tenders. Whip egg whites lightly with milk.
Blend remaining 3/4 cup oat bran with paprika. Dip meat into egg whites, then into oat bran paprika mixture. Place on baking rack and allow 5 minutes to dry. Heat peanut oil in large frying pan until hot. Brown tenders 2-3 pieces at a time for 3 minutes per side, or until crusty and brown. Drain well and serve with a low-fat dip.
>> Crispy Chicken Tenders
1 c All-purpose flour
1 ts Poultry seasoning
2/3 ts Paprika
1 ts Onion powder
1/2 ts Garlic powder
1/4 ts Salt ds Pepper
1 Egg
1 ts Milk
3/4 lb Chicken tenders Cooking oil
Combine dry ingredients in a plastic bag. In a bowl, lightly beat eggs
and milk. Dip chicken pieces in egg mixture and shake off excess. Shake a few chicken pieces in the bag at a time, coating well.
In a large skillet, heat 1/4 in. of oil over high heat; brown chicken on all sides. Reduce heat to medium and continue cooking for 10 minutes.
That's it for today! If you want more chicken tender recipes just check below:
Bigg Boss 4 - October 20 2010 - Part 2/6
Bigg Boss 4 - Episode No: 18 Shveta sits before Khali and Rahul in the swimming pool discussing Khali as Indian or foreigner. Begum rests. Manoj in the confession room and asks him to choose two. He can either chose himself or take the suggestions of the players. Everybody is asking him to declare the candidates. Democracy or dictatorship. Lies about the method. Manoj asks for votes. Begum and Shveta discuss Ashmit and Hrishant way of talking. Also Sara in the kitchen, the frying pan and egg. Begum Ali is fed up and wants to go home. He does not want to blast like a pressure cooker. Hrishant and Shveta conspire about the note bundles. Hrihant gives massage to Sara, She has a cramp. Shveta joins the counting team. Ashmit walks in, Sara stops.
Craft Using Egg Whites
Most of you know that there are lots of foods that can be cooked using eggs especially the egg yolks. But have you thought of how to make use of the egg whites too so it will not be wasted? These days, you need to think of some other things that will make everything useful. There is no need to waste things especially the egg whites because there are also delicious treats that can be done with it.
If you are thinking of yummy craft that can make egg whites useful, there are lots of it in most recipe books, magazines and online. You will not have a hard time finding what you need these days because of the advent of technology. Most of you must be familiar with the devil's cake and custard. In these foods, you can use numerous left over egg whites so you don't need to put them into trash. Here are some helpful tips for you in using egg whites on cakes and other food craft:
1. Angel cake -usually, the angel food and the devil's cake will be baked at the same time using the egg yolks and whites separately. With the use of egg whites, you can just make the egg less fluffy and less smooth but the outcome will be the same as the usual one you are making.
2. Meringues -egg whites should be beaten with sugar. It is very easy to do and it usually cost less than other types of desserts. This sweet craft is fun to do because you can also colour them according to your desired colour and appearance.
3. Pavlova -in this dish you can make a huge number of egg whites. This is also similar to meringue the only difference is that it is flat and contains fruits. It is similar to tart but it is sweeter than a tart. Usually, this is used as a party treat for kids because it is cheaper than other types of party treats in the market. Pavlova is a nice food craft you can make with kids.
4. Forgotten cookies -this is also similar to meringues but it is done in a smaller size and it looks like cookies. It can be garnished with cookies, chopped almonds, and nuts. This is delicious and attractive for kids and kids at heart.
5. Lemon meringue pie -meringue is a typical dessert you can make using left over. There are lots of varieties when it comes to making your own version of it. This lemon pie is similar to the regular meringue you know but in this version you will only use egg whites.
6. For low carb dishes - many of you are aware that eggs contain a lot of benefits to health but eating much of it can also affect your diet. You can use 2-3 egg whites in replacement of 1 whole egg. You can do this if you need to lower down your cholesterol and calorie level.
cooker
this is a video how to fry an egg.THen kbhjhkjjabcdefghijklmnopqrstuvwxyz ajde vise nano ajde jebacu ti sve da kucu prodamoooooooooooooooooooooooooooooooooooooooo kkkkkkkkkkkkkkkkaaaaaaada nemam nnnnikogaaaaaaaaaaaaaaaaaaajebacu te jajaujajajaj letsi igo lets go lez go
Antique Bronze Mother Daughter, Frame
Antique Bronze Mother Daughter, Frame Review

Antique Bronze Mother Daughter, Frame Feature
- 71" in Height
- Antique Bronze Body Finish
- Decorative Glass Shade
- Rotary 3-Way Switch
- Has a additional side reading lamp
Antique Bronze Mother Daughter, Frame Overview
Stylish torchiere lamp has added conveinience with a 40W reading lamp included. Measures 71" in height and uses standard incandescent bulbs.
Available at Amazon Check Price Now!
*** Product Information and Prices Stored: Nov 23, 2010 05:16:22
Max Burton 6015 Portable Induction Cooktop Stove and Interface Disk Combination Set
Max Burton 6015 Portable Induction Cooktop Stove and Interface Disk Combination Set Review
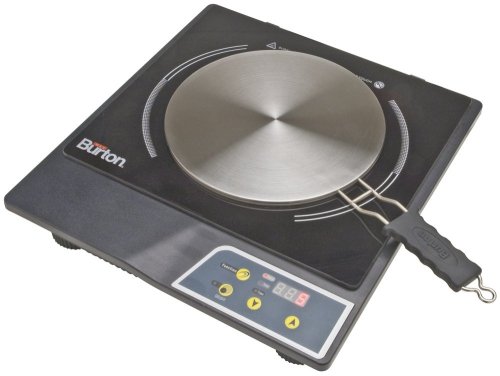
Max Burton 6015 Portable Induction Cooktop Stove and Interface Disk Combination Set Feature
- Induction-powered cooktop stove and stainless-steel interface disk
- 10 power levels; variable temperature from 140 to 450 degrees F
- Heats instantly; cookware detection sensor and overheat sensor; timer
- Disk placed on top of burner allows for cooking with any type of cookware
- Cooktop stove measures approximately 13 by 13 by 4 inches; disk measures 8 by 15 by 1/2 inches
Max Burton 6015 Portable Induction Cooktop Stove and Interface Disk Combination Set Overview
Induction Combo Set includes an Induction Cooktop Stove (1800 Watts, LED Display, 10 Power Levels Temperature Range from 140 to 450 degrees F, 180-Minute Timer, Cookware Detection Sensor and Overheat Sensor Combined) and an Induction Interface Disk (8-inch Diameter, stainless steel construction, heat proof handle). Allows you to use any non-induction (non -ferrous) cookware including Aluminum, Glass, Copper, Porcelain and Stainless Steel. Ideal uses such as Buffets, Catering, Dorms, Home or Office Assisted Living Housing
Available at Amazon Check Price Now!
*** Product Information and Prices Stored: Nov 19, 2010 05:15:19
Natural Gas Barbeque Grill - Never Run Out Of Gas Again
Few things are more embarassing to a backyard grillmaster than running out of gas in the middle of a barbeque party. We've all been there before. You've got everything running smoothly and your guests are munching on hot dogs and burgers while they wait for the steaks. You take a swig of your beer and then look down to see your grill flames have gone out. You're out of propane!
Hopefully you have another tank of fuel in the shed or the garage. It's embarrasing enough to have to scurry around swapping out the old propane tank for a new one in the middle of a party. What's worse is having to run out to get a new one while your guests stand around with grumbling bellies. Besides, you've already thrown off the cooking time of the meat on the grill so you'll never get it "just right" now.
Don't you think its time to ditch the clumsy propane tanks and go with a natural gas barbeque grill? Natural gas grills have many advantages over propane. You'll never run out of gas again. No more running out of fuel right in the middle of a big cookout. Also, natural gas is cheaper. Depending on where you live, you could save 50% or more by switching to natural gas. And natural gas barbeque grills are cleaner and better for the environment.
Just about any propane grill can be converted to natural gas. All you need is an inexpensive conversion kit that you can get from the manufacturer or a third party retailer. Basically all you have to do is change the regulator. Then all you need to do is run a gas line from your house into your backyard. This is a job for a professional. Running a gas line to your deck or patio isn't something you should do yourself unless you are a qualified contractor. Just contact your gas company and ask for some referrals. It's a simple job that should only take a couple of hours and won't be too expensive. And once it's done you'll never have to worry about running out of gas during a cookout again.
Ovedrview Of The Primo Oval XL Kamado
Chef Tony shows you all of the details of the Primo XL oval ceramic kamado cooker. He zooms in on the inside fire box, grill grates and bottom damper; trying to answer any questions you might have before purchasing a ceramic cooker. The unit is on a cart making it easier for him to show you all sides of the cooker and show you some of the possible accessories for this unit. We hope this will make your decision easier and that you find this video educational.
What's for Dinner Sunday Edition: Chicken Caccitore
Hello! Sunday dinner, slow cooked and satisfying Chicken Caccitore. In the video I refer to the word Caccitore meaning "country style" however, I remember (after I uploaded the video) that it does indeed mean "Hunter style" So, there you have it. This is what you will need to make Chicken Caccitore: 2-3 pounds of chicken leg quarters (or one cut up chicken) 4 slice of bacon cut into "lardon" or small slices 1 medium onion chopped 4-5 cloves of garlic chopped 1 bell pepper sliced 1 pound of button or baby bella mushrooms quartered Olive oil 1 Tbsp each, fresh rosemary, thyme and sage chopped finely. If using dried herbs use one Teaspoon of each. 2 pints or 2 cans of stewed tomatoes or you can use what you have, crushed, diced, sliced, whatever! 1 or 2 cups of chicken stock Egg noodles Begin by browning off your chicken pieces in a heavy skillet, when done remove to a baking dish or the crock pot or your roaster/slow cooker pan. Drain the chicken fat from the pan and add the bacon. cook until the bacon is browned but not too over done. Add your garlic and onion and cook until translucent, add your bell pepper and cook just a few minutes. Add these veggies to the pan with the chicken. Don't worry about distributing them evenly, that will work itself out later. Next, take half of your quartered mushrooms and add them to the pan with about a teaspoon of olive oil. Cook until they are lightly browned and have rendered all their liquid. You should have a lightly moist pan. You ...
Komodo Kamado Grill BEST GRILL part 3 of 3
KomodoKamado.com is the maker of what is considered by most as the best grill in the world. This video (part 3 of 3) is an interview with an actual customer.
west bend dba/focus electrics Elec Egg Cooker egg cookers
west bend dba/focus electrics Elec Egg Cooker egg cookers Review

west bend dba/focus electrics Elec Egg Cooker egg cookers Feature
- Poaches or hard- or soft-boils eggs at touch of a button
- Egg rack holds 7 eggs; nonstick poaching pan holds 4 eggs
- Includes measuring cup with egg piercing pin
- 1-year warranty
west bend dba/focus electrics Elec Egg Cooker egg cookers Overview
West Bend, 350W, Electric Egg Cooker, Poach, Hard Or Soft Boil Eggs Or Steam Scramble, Poaches 4 Eggs, Hard Or Soft Boils 7 Eggs, Timed Cooking Cycle With Audible Alert & Automatic Shut Off When Eggs Are Done, Indicator Light, Includes Non-Stick Poaching Pan, Clear Cover, Egg Rack & Measuring Cup, Heat Resistant Base, 1 Year Warranty
Available at Amazon Check Price Now!
*** Product Information and Prices Stored: Oct 30, 2010 05:10:17
Homemade Chicken Noodle Soup
Chicken Noodle Soup is one of my specialties. The recipe I use varies in the way I make it each time. This is my own recipe, never written down, one of those experiments that comes from my head. As with the many of my recipes, I will throw this and that together; a handful of this and several shakes of that. When I do use a recipe, rarely do I follow it completely the way it is written.
This is a recipe is for a slow cooker, but a large stock pan can be substituted. Adjust the seasoning to your taste.
3 1/2 to 4 lbs. frying chicken
1 large onion (or 2 medium) - diced
3 carrots, sliced
3 celery stalks, sliced
1 tsp. salt
1/2 tsp. pepper
2 tsp. lemon pepper
1 tsp. basil
1/2 tsp. thyme
2 tsp. parsley flakes (crushed)
1/2 tsp sage
2 tsp. beef bouillon (or 2 cubes)
2 tsp chicken bouillon (or 2 cubes)
1 1/2 to 2 c. 100% orange juice
2 1/2 to 3 c. egg noodles
5 c. of water
1 c. of water for bouillon
Wash chicken thoroughly, peel off skin and cut off any excess fat. Place chicken in slow cooker with 5 cups of water (or enough to cover chicken). Follow the directions on the slow cooker. In most cases, heat at 300 degrees until boiling, then simmer 3 to 4 hours. Chicken will be done when the meat falls off the bone.
During the time that you are cooking the chicken, cut up the vegetables and set aside.
When the chicken is done, take it out of the cooker, debone the chicken and break it into pieces. Strain the broth for any small bones through a strainer. (You can also strain it through cheesecloth to trap some of the grease. The fat can also be removed by chilling the broth overnight and skimming off the layer of fat from the top.)
Add back all of the broth to the slow cooker. Place the bouillon in the cup of hot water and mix until dissolved. Add the bouillon mixture and the orange juice to the slow cooker. Combine the chicken, vegetables and spices to the slow cooker. Heat the soup to boil and then simmer for at least an hour or until vegetables are tender.
Cook the egg noodles according to the directions, and then add to the pot. Cook another 30 minutes.
Makes about 4 1/2 quarts
Serves 10 (or 4 very hungry people)
Added notes:
Soup can be placed in smaller containers for the freezer. Soup can be frozen for several months.
To see the video of this and read about the history of Chicken Noodle soup, go to Homemade Chicken Noodle Soup
Tips on making barbecue with the Weber Smokey Mountain
Barbecue - REAL barbecue - is meat or fish cooked in the heat and smoke of a wood fire. The Weber Smoky Mountain (WSM) bullet smoker is one of the easiest tools you can use to turn out outstanding barbecue from your own backyard. This follow-on video to "How to Barbecue Ribs on the Weber Smokey Mountain" www.youtube.com goes more in-depth into how I like to run my WSM
How To Tell If Eggs Are Rotten
When eggs reach their expiration date you shouldn't just through them away. There is a few ways and tests that you can do to see if they are still fine. I test my eggs to see if they are still eatable by doing the following tests.
Firstly I take a deep bowl and fill it up with water. Now put the egg in the bowl and if the egg sinks straight to the bottom it is still fresh, if you put the egg in the water and it floats it means that it is old but may still be safe to eat. Make sure the bowl is deep enough so that if you put the egg in the water you can be sure that it sinks when it goes to the bottom.
Seeing that the egg might still be eatable when it floats but just a bit old, I do the crack tests to see if it would be safe to eat. What I do is I crack the egg on a separate bowl and through the egg inside. I then smell the egg and if it gives off a unpleasant smell it is rotten and you need to through it away.
But if it still doesn't give of a smell I look at the egg white to make sure that it is safe to eat. If the egg white has a pink look to it that means that it is off and not safe to eat. Don't worry about red spots as they are only the blood vessels that occur during ovulation and has nothing to do with freshness.
One more thing to notice when looking at the egg white is this, if the egg white is cloudy then it is very fresh, if it is clear however it means that it is aging.
CLEANING UR BIG GREEN EGG SMOKINGUITARPLAYER VIDEO
In this episode the SmokinGuitarPlayer shows us how to deep clean a Big Green Egg using his trusty Medium Egg as his exemplar grill. He removes the guts and cleans it out simple you bet and now you can see how its done. NOTE, this should service should be performed every 10 cooking sessions or so if you want your cooker to perform correctly . And make sure it isnt hot when you go digging around in there! Happy Eggin and check out our website and store Freds Music & Barbecue Supply - The Ceramic Grill Superstore at www.fredsmusicandbbq.com
Egg Commercial
Made for Video Production Class Egg Cooker: Otto Pataki (evilotto91) Man: Adam LAST NAME WITHhELD(2mediumpizzas) Cameraman, director, idea man: Ben Ireland (rikitybridge) Song: Moondance, Van Morrison
Experiment 1 - Egg in a microwave oven.
First video of experiments with a microwave oven. In this experiments you can see what does a egg with a lot of microwave.
Venison Stew Recipe or Old Fashioned Beef Stew Recipe
Venison Stew and Beef Stew Recipe
1 1/2 lbs venison hind quarter (or stew beef); cubed or not
2 quarts water
1 small onion
1 stalk celery
2 sprigs thyme
2 bay leaves
several sprigs parsley
salt and pepper
+/- 3 cups potatoes, cubed
3 carrots, peeled and sliced
1/2 lb mushrooms, sliced or quartered
1 medium onion, chopped
2 T olive oil
3 T all purpose flour
Put venison or beef in pressure cooker. Add small onion, celery, thyme, bay leaves, parsley, salt and pepper. Juniper berries are a good addition also.
Bring to boil. Off heat, put on lid and bring to pressure, jiggling for about 25 minutes. Cool. Remove everything from broth and discard everything but meat. If you started with a whole piece of meat, chop or shred, according to your preference. If you don't have a pressure cooker, get one. Just kidding! Instead, put everything in a pot and simmer for at hour or so, until the meat is very tender. Cool and chop meat, if you didn't to begin with.
Add potatoes and carrots to the pot. Cook until tender, about 15 minutes.
Return shredded or chopped meat to the pan.
Meanwhile, sauté onions in olive oil until tender but not browned, less than 10 minutes. Add mushrooms and sauté until tender, about 3-5 minutes. On low temperature, add flour. Mix well, stirring continuously until it is a thick roux and getting lightly browned. Add a cup of the hot broth and stir until it is smooth and lump free. Add the roux to the broth and simmer until thickened. Taste to correct seasoning, adding salt and pepper, if necessary. Serve with crusty bread and a green salad.
BIG GREEN EGG NOMEX GASKET PART 1 OF 3 INSTALLATION SMOKINGUITARPLAYER VIDEO
In this 3 part installment of the Video show Pickin N Grillin presented by Freds Music & BBQ Supply Shop in Shillington Pa. . the SmokinGuitarPlayer (AKA Fred Bernardo) shows us how to install a Nomex, flame retardant gasket kit onto a well used Big Green Egg Ceramic grill. Youll see the tools and supplies needed as well as how to prepare the grill for the new gasket and how to adjust and tweak the seal of the cooker after the new gasket is installed. You can get the NOMEX GASKET KITS AT Freds Music & BBQ Supply in Shillington, Pa. www.fredsmusicandbbq.com.
Hamburger Meat in the Crockpot
I happen to be a ground meat lover. While today I use mostly ground turkey, I still love my ground meat recipes. I own a cookbook called 365 Ways to Cook Hamburger. I love that cookbook. When I began using my crockpot more often, I began to look for ways I could convert many of my favorite recipes to crockpot recipes.
Since I began using ground turkey, one of my favorite dishes is meatloaf. I rotate making it in the oven and making it in the crockpot.
I use between two and two and a half pounds of ground turkey. Many people mix ground meats. I just use the turkey. Your consistency will be different if you use ground lamb, ground pork or ground beef. All are fine to use, you'll just taste the difference. The ground turkey doesn't always hold together from the crockpot, but the taste is wonderful.
In a large bowl, mix the ground meat with all of the following:
1 egg
1/4 cup ketchup
1/4 cup water
1 tablespoon Worchester sauce
1 tablespoon brown sugar
1 cup breadcrumbs
Diced onion to taste - My daughter does not like real onion so I use a few spoons of onion flakes.
After mixing together, shape into a ball that will fit into your crockpot. As I mentioned above, this does tend to fall apart a bit, so line your crockpot with foil. Fit the ball into the foil and cover. Cook on low about eight hours.
We will often add a quarter cup to a half cup of Parmesan cheese to the mixture. We love the taste of the cheese in the meatloaf.
When I was a child growing up, my mom used to make sweet and sour meatballs that we all begged her to make often. It was the simplest of recipes. She combined grape jelly and chili sauce to make the sauce. Then she'd boil it down twice before serving. I found a way to convert this recipe to my crockpot.
Since I start with ground turkey, I add breadcrumbs to the meat to help hold it together. I use between one and two pounds of meat, usually closer to the two pound mark. In a bowl, I mix a sixteen ounce jar of grape jelly and a twelve ounce bottle of chili sauce. I form the meat balls and roll them in the mixture. Then I place the meatballs in to the crockpot. Once I've coated the last meatball, I pour the sauce into the crockpot, over the meatballs. Cover and cook on low six to eight hours. These are wonderful over brown rice. The sauce soaks in the rice and it's just delicious.
Electric Egg Poacher Steamer Cooker MD-3104 from Dinodirect.com
Good working condition. At most boil 4 eggs once time. It takes only 10
MAD MAX TURKEY METHOD PART ONE (of 3)
Part 1 of a 3 part series. Mad Max Beyond Eggdome (Max Rosen) visits us at Freds Music & BBQ Supply (in Shillington Pa. ) for our annual Turkeyfest turkey grillin, roastin, and smoking celebration. You can find all the videos on our website at www.fredsmusicandbbq.com by clicking on the VIDEOS tab at the top of the page. At Turkey fest (and on these videos) Max shows us how to prepare a Mad Max Turkey and roast it to perfection on a Big Green Egg AND how to make the gravy from the drippings and lots of white wine! ..Youll learn how to prepare a stock for later use in the gravy, how to load the bird with aromatics and give it a good rub with Tasty Licks BBQ Traditional Turkey seasoning, put it in the cooker or your home oven and roast it and it turns out great if you follow Maxs easy instructions. Be sure to check out our entire Roasting - Grilling - Barbecue - Pizza Baking video library at www.fredsmusicandbbq.com better yet subscribe now. BE SURE TO CHECKOUT PARTS 2 AND 3 ON YOUTUBE OR ON OUR WEBSITE AT www.fredsmusicandbbq.com
Maverick Henrietta Hen Egg Cooker
For More Info or to Buy Now: www.hsn.com Get a helping hand from a charming new kitchen friend with the Maverick Henrietta Hen Egg Cooker. More than a just a delightful conversation piece, this versatile egg virtuoso has the ability to... Prices shown on the previously recorded video may not represent the current price. View hsn.com to view the current selling price. HSN Item #304154
How to make Gudeg (Javanese traditional food)
How to make Gudeg with slow cooker (Cara membuat Gudeg makan tradisional Yogya) Ingredients : Chicken meat, Jack Fruit (nangka/kluwih), Boiled egg Seasoning: Shallot, garlic, palm sugar, tamarind (asam jawa), Corriander seeds, daun salam, lengkuas, coconut oil, salt
Kitchen Designs For People With Challenges
There are many changes that may be made to a kitchen to enable a less mobile person to lead a fuller life. Instead of regular shelves, use pull-out shelves or storage bins. Cabinet knobs should be replaced with pull handles. A stove with front controls is particularly helpful to those in a wheelchair. Increasing the height of the dishwasher by about six inches will make a big difference in its usability for someone in a wheelchair. If there is a table in the kitchen, it is more helpful to have one with a central stand rather than four legs at the corners to allow wheelchair access or simply to avoid bumping into the table legs. An important exception to this rule is if the user places a lot of body weight at the table edge, for example to lean or pull up on. Additionally, mobile units such as kitchen carts can be very helpful to push items from one part of the kitchen to another.
Electrical changes in the kitchen should not be overlooked - lighting changes may significantly improve vision, especially early in the morning or late at night. Addition of automatic sensors or timer shut-offs to taps and extractor hoods can reduce repetition of tasks that might seem simple to the able-bodied but which require constant additional effort on the part of the disabled. Washing food, hands or dishes is probably one of the most frequent tasks that take place in the kitchen, so installation of lever taps rather than turn taps will also make for easier living.
It is wise to seek the advice of a certified kitchen planner (with experience designing for the disabled) before making changes. This is because they will be better able to suggest what changes should be made for the needs of the particular individual. Additionally, they will have a strong idea of the costs involved, which is especially important if not all the desired changes are financially able to be accomplished at once. A certified kitchen planner will be able to give guidance as to which changes need to be strongly prioritized up-front, for example those that are for safety reasons.
Parmesan Pork Chop Recipe
For more products, grilling tests, and recipe information, please visit us at www.bbqguys.com This is for anyone looking for a great, but quick and easy pork chop recipe. Begin with bone in center cut pork chops, about one inch thick, grab some Parmesan cheese, a couple lemons, some dried sage, panko (Japanese breadcrumbs), some flour, eggs, salt and pepper, and your half way there. Salt and pepper your pork chops, blend the cheese, breadcrumbs, and lemon zest together with the sage. Season your flour, and prepare an egg wash with your eggs and fifty percent water; now your ready to go. Preheat your oven or grill to medium high and begin the dredging process. Dredge the pork chops, one at a time, in the flour, then the egg wash, and finish up with a nice crusting through the breadcrumb and herb mixture. With all of your pork chops coated, they are ready for a few minutes on each side in your cooking method of choice. Remove from your grill or oven and enjoy! Chef Tony
Tips on Buying and Cooking Potatoes
Since we are all trying to save money these days, I'll bet we are all using more potatoes than ever before. Potatoes are good source of vitamins and minerals. Potatoes contain no fat or cholesterol and minimal sodium. A six-ounce potato contains 2 grams of highly digestible protein, almost as much as half a glass of milk. Here is the breakdown on nutrients in potatoes:
An average (~5.3 oz) potato with the skin contains:
* 45% of the daily value for vitamin C
* 620 mg potassium
* trace amounts of thiamin, riboflavin, folate, magnesium, phosphorous, iron and zinc
* 110 calories and no fat.
Here are some tips from Graham and Rosemary Haley's book Haley's Hints on using and buying potatoes:
Peeling - Pour boiling water over potatoes just before peeling to ease the peeling process.
Consider not peeling - The Haley's offer a most interesting statistic on potato peels. "It's said that the average family's annual potato peels amount to the following nutrients. The iron provided by approximately 450 eggs, the protein of 50 steaks and the vitamin C you can get from 100 glasses of orange juice."
Baking Potatoes - Boil potatoes whole for fifteen minutes before placing in a hot oven. Saves half the baking time. Did you know your oven is the one of the most expensive electrical appliances to use in terms of kilowatt used per hour? To keep your baked potatoes warm slip them into an extra pair of oven mitts. They'll stay warm until you are ready to serve.
Creamy Mashed Potatoes - Mash potatoes will be light and fluffy if milk is heated and added before mashing. If you do not want to use milk in your mashed potatoes add some of the water you boiled the potatoes in to increase fluffiness. If your mashed potatoes are too soggy, stir in some powdered milk gradually with a whisk until texture is satisfactory.
Home fries - Sprinkle potatoes to be fried with flour. They come out golden brown. Add garlic salt and a bit of paprika for extra flavor.
Un-fried Fries - Coat french fry cut potatoes with egg whites and add a little seasoning like paprika, salt and garlic. Bake in 350 degree oven until golden brown.
Buying Potatoes - Pick potatoes with a uniform shape. Size doesn't matter, as long as they have a good weight to them. Look for potatoes with a smooth texture and firm feel. Watch out for 'eyes', cracks, shriveling and a greenish texture.
Portable Chicken Shaped Egg Poacher Cooker White from Dinodirect.com
Lovely Hen Shaped Egg Poacher Steamer Cooker. Good working condition and high
Egg Cookers, Proper Maintenance, and an Egg Recipe
Egg cookers are one of the greatest kitchen appliance inventions. Gone are the days when you crack egg shells crudely with a fork or the back of your knife. There is no sweating anymore in trying to get the right consistency every time. You can now get rid of fatty oils because egg cookers can cook eggs without oils.
Egg cookers are designed with variable settings so you could cook your eggs just exactly how you like it. You could adjust the heat and the consistency of your egg.
There are actually indications with only three levels. The water level chooses the kind of egg that will going to be boiled, whether it is medium, soft, or hard-boiled. When there are no signed levels within the egg cooker, there is a measuring cup provided so that a person can fill it up with the appropriate amount of water.
Egg cookers are so easy to use that a user only needs to put its foundation with water, put the eggs within the tray, cover the top of the cooker, and after that, switch on the button. When the water boils, it is the steam built within the egg cooker. This may cook the egg just the method a person wants. With steam and the consequence that it is cooked in a covered container, the cook guaranteed that the nutrients of the egg are still there.
Preserving Steam Egg Cookers
Egg cookers are one of the most frequently used kitchen tool. Eggs are served in breakfast and used in many recipes after all. It is important therefore to take care it of well to last longer. It has to be cleaned after every use.
Unplug it when not in use. Let the heat be released after use before cleaning it. Wash the important parts like the poaching tray, cooking tray, egg pan, top, service pan and egg ring.
It is enough to use soap and hot water. Allow it dry on air instead of towel drying. It is also possible to scrape off the platen. Be sure that the remains or small particles are washed clear.
You could clean with soap and water daily. And then once a week you can perform a thorough cleaning. Wet a paper towel by 1 tablespoon of white vinegar. Clean it to make the heating plate free from any dirt. It removes all the mineral elements left behind from previous cooking. It also works as a better antibacterial medium. This can be done often because actuating purely soap and water may still bring mineral formation, guiding to discolored egg shells but the color never influence the eggs savor and taste.
The more known brands of the egg cookers are Oster, Krups, Chef's Choice, Cuisinart, Maverick, West band and Nordic Ware. Here is a yummy and nourishing breakfast everyone may serve using hard-boiled eggs.
This recipe is called creamed eggs with ham. The ingredients are: 1 cup of ham. It has to be cooked and cut into julienne strips. ¼ c green sliced onion is also needed. ¼ c green chopped bell pepper, sliced 2 tbsp flour, ¼ c red chopped bell pepper, 2 c milk, chopped 4 hard-boiled eggs, 1 ½ c asparagus and cut and cooked to 1in or pc hot Cooked rice or baked puff pastry shells.
To cook this recipe, put the eggs on top of a medium-high heat through a big skillet. Add some margarine or butter. Next, cook some ham until it becomes lightly brown. Third, put the bell peppers and onion mixing sporadically. The flour may add and continue mixing once the vegetables become green.
The pan may now be removed from the stove once the flour is soaked up completely and while showing off a soft mixture. Fill it up with some milk but only in small amounts once in awhile together with stirring it finely. Put the eggs and asparagus once it becomes smooth and thick. Put them onto the skillet. After that, reheat it. And now, this can be served with puff pastry shells or cooked rice.
vegetable supplement italian christmas cookies flavored rice
Chuck Roast With Vegetables Slow Cooker Recipe
This is an easy and delicious recipe for cooking a roast in your crockpot or slow cooker. The roast is tender and nearly falls to pieces. There's plenty of tasty gravy too.
The vegetables are added when there is approximately 2 1/2 to 3 hours cooking time left. If you won't be available to add the vegetables at that time, don't worry. You can use the gravy to serve with mashed potatoes or over cooked noodles. I like to cook my egg noodles just before I plan to remove the roast and vegetables. Once the roast and vegetables have been placed on a platter, I add the noodles to the gravy just to let them absorb extra flavor.
Chuck Roast with Vegetables Slow Cooker Recipe
Ingredients:
3-4 lbs. chuck roast
6 potatoes, quartered
4 carrots, cut into 1" pieces
3 stalks celery, cut into 1 1/2" pieces
2 large onions, quartered
1 can cream of mushroom soup or cream of celery soup
1/2 soup can water
1 teaspoon black pepper
1/2 teaspoon salt
Flour or cornstarch for thickening
Preparation:
Mix soup, water, pepper and salt together in the slow cooker.
In a large skillet, sear the roast on each side using a small amount of oil before adding to slow cooker, or place directly in soup mixture in slow cooker. Make sure both sides of roast have been coated with soup mixture. Set slow cooker to low and let cook for 4 hours.
After 4 hours, add potatoes, carrots, celery and onions to the cooker. Lift roast so vegetables are submerged in soup mixture. Continue cooking on low for another 2 1/2 to 3 hours, or until roast is tender and vegetables are done.
Remove roast and vegetables to a platter. Add small amounts of flour or cornstarch to soup mixture to thicken slightly. Serve gravy over roast and vegetables, or over mashed potatoes or cooked egg noodles.
Overall cooking time is 6 1/2 to 7 hours on low setting.
Egg Genie Commercial and Review
Read Reviews at www.jennyreviews.com My friend just showed me a glowing review of the Egg Genie, and I love this thing too — it makes cooking eggs so, so easy. I ordered one of the cute little things right away. I love eggs, so how could I not. The cool bubble design reminded me of my mothers old electric egg cooker. When it came, I was pleasantly surprised at how sturdy it seemed. I have a feeling this thing will last a long time, just like my mothers. Now, instead of boiling a whole pot of water and waiting so long for it to get going, I can just pop the eggs into the Egg Genie, set it and forget it. It comes with the Bacon Wave too, which is a really handy device to cook bacon in the microwave — but if youve tried that before, this thing actually works. You just pop frozen bacon into the upright slots and it cooks it to crispy perfection. Read more reviews at www.jennyreviews.com
Egg Genie Electric Egg Cooker @ Bed Bath & Beyond
video.bedbathandbeyond.com View this video featuring the ProCaulk" Caulking Tool Kit - Bed Bath andamp; Beyond product and shop other similar products on bedbathandbeyond.com. Featured in the video: [1] ProCaulk' Caulking Tool Kit - Bed Bath & Beyond direct-url.com
vegetable supplement flavored rice italian christmas cookies
Unrivaled Ease - Rival Slow Cookers
Having a busy life doesn't mean you have to give up the luxury of savoring slow-cooked meats and sauces. Put down that microwave meal and pick up a Rival slow cooker; you'll be dishing out delicious stews, roasts, and dips in absolutely no time, well, no prep time that is. By cutting up a few vegetables, dropping in your meats, and setting your Rival crock pot slow cooker on low, your meal will collect layers of flavor as you go about your daily business, waiting for you to come home and find it hot and ready to go.
No matter what number of family members expect to share your meal, there's a slow cooker to pull out for the job. Unlike older, clunky models, the new Rival slow cookers come in a wide variety of sizes and styles that won't cost you the monthly food budget. A good general size crock pot is the Rival 38501-W 5 Quart Round Smart-Pot. Selling for just twenty-five dollars, this crock pot is big enough to serve five or six people. It also has a neat programmable feature which switches it over to warm mode automatically so that your food isn't ever overcooked!
The 3.5 quart model is perfect for families of three or four, and slightly larger 6 quart options like the Rival 3060-W 6 Qt Round Manual White are also available for around the same price. You can serve an entire party easily, classy and fun; travel cases make taking along your treats even easier. But what if you live alone? No, you don't have to cook up feasts just to enjoy the flavors of a crock pot meal. Rival slow cookers also come in a handy, small variety, like the Rival 32041-C 16 oz Little Dipper.
Selling for only ten dollars, this little wonder is great for making a bow or two of soup or cooking a small piece of meat for your evening meal. Also, as the name implies, this is great for parties too; you can take in your favorite warm dips or even create a meal around fondue made in your cooker. And the entire process is easy! You can even pick up the Rival slow cooker cookbook so you'll never be short of ideas. Whip up and simmer stews, casseroles, roasts, dips, and even tasty deserts without standing next to your hot stove for hours on end with this simple addition to your kitchen.
7 Tips on Selecting the Right Tap Water Purifier For Your Home
Are you considering buying a tap water purifier? It's a smart idea. However, you want to be sure you get the right water filter as many do not work so great. But how do you know which one to buy?
Here's a list of tips when looking for a new tap water purifier:
1) Performance data. Check out how the purifier performs before you buy it. The supplier should have this information post on their website.
2) Contaminant Removal. Find out what the filters can remove. Removal of chlorine, pesticides and pharmaceutical drugs is an absolute must.
3) Single stage filters do not remove enough of the contaminants. These are found in products like Brita and PUR. These typically will remove some of the chlorine in your water but do not remove other toxic chemicals.
4) The purifier must have a carbon absorption block. This will remove 99.9% of all toxic chemicals commonly found in your tap water.
5) Avoid reverse osmosis filtration systems. These are very expensive and not so effective, In fact, they not only allow contaminants like pesticides to pass right through, it removes all of the healthy water minerals. You're left with de-mineralized water that still has toxic chemicals. This is probably the worse system you could pick.
6) Parasite removal. Chlorine no longer kills all of the parasites in public water systems. These creatures can cause serious problems with your digestive system. Be sure your tap water purifier removes parasites.
7) Metal contamination. Piping systems will corrode over time. Trace amounts of metal ions make their way into public drinking water. Metal ions can lead to serious illness so you need a system that will remove them.
So, there you have it. A list of what you need in a tap water purifier system. Do yourself a favor. Take this information and get a system today. Your health depends on it.
Maker's Mark Bourbon Sweet Potato Pie - www.kon-tent.com
Here I make my version of Sweet Potato Pie. I infused it with Maker's Mark Bourbon and separate the eggs, whipping the whites separately to create a soufflee'd version. Alternatively, I use phyllo dough instead of pie crust to create a crunchy crust. Bourbon-Sweet Potato Pie 2 medium sweet potatoes, peeled and cut into 2" cubes 1 teaspoon ground ginger 1/2 teaspoon fresh-grated nutmeg 1/2 teaspoon pure vanilla extract 1 teaspoon cinnamon 1/4 teaspoon salt 4 large eggs, separated ¼ cup packed light-brown sugar 1 cup half and half 1/4 cup unsalted butter, plus 1/2 cup melted 1/4 cup all-purpose flour 1/4 cup Maker's Mark bourbon 1/3 cup plus 1/3 cup granulated sugar 1/2 teaspoon cream of tarter 8 sheets frozen phyllo dough , thawed in refrigerator Preheat oven to 375 degrees. Put cubed potatoes in pressure cooker along with ½ cup water and set for six minutes. When pressure cooker is done, do a quick pressure release to release steam and once it is all out you can remove the top. Place cooled, cubed potatoes into a ricer and process into a large bowl until you roughly have 1 1/2 cups. Measure out ginger, nutmeg and cinnamon, placing half of each into a small bowl to divide them evenly. Using one of the bowls of spice mixture, place in a large mixing bowl along with vanilla, salt, egg yolks, bourbon and brown sugar; set aside. Make a roux by melting 1/4 cup butter in a medium saucepan over medium-high heat, then whisking in the flour - add in half and half, whisking until ...
Komodo Kamado Grill WORLDS BEST GRILL Part 2 of 3
KomodoKamado.com is the maker of what is considered the best grill in the world. This video (part 2 of 3) is an interview with an actual customer.
Outdoor Cooking Spaces - Innovative Ways To Get The Best Out Of Your Outdoor Cooking Area
Cooking equipments could be appropriated to a number of outdoor activities. You could use different methods like Dutch ovens or grills. You should list all of the outdoor cooking possibilities. Of course there are a lot of differences when it comes to cooking meals. There are delicacies specially made by Dutch ovens or even your ordinary tinfoil dinners. It is therefore important to take time to prepare. It is always a good idea to list all of your cooking ideas first. Don't forget to plan ahead. Where do you want to hold it? In a friend's house or at a picnic grove? The venue is also important to be able to make sure that it is safe to cook in that area. After that you should also determine what things to bring. Remember to create a satisfying menu so that you and your guests will enjoy the outdoor experience. To further help you in creating the perfect outdoor experience, here are a few tricks and tips that you could do.
When it comes to planning, you should take all the time you need. After finalizing the menu, you should now check whether you have all of the ingredients for the recipes as well as the proper equipments to bring with you. Do you need a gas stove? Or are you going to make do on an open fire or charcoals? How are you going to cook your meals? Ask these questions first.
You should also take time when it comes to choosing the perfect site, for safety issues. There might be restrictions on the area that you selected so make sure to find out first. There are common restrictions on beaches, camping grounds and other picnic groves. You should always pt safety first in case a fire starts.
For outdoor cooking, you should also bring a tarpaulin that is held together by two bamboo poles or any pole made of sturdy material. This is to protect the fuel products that may cause fire. If you do not have tarps, any fire resistant cloth will suffice.
When it comes to outdoor trips, it is wise to carry extra fuel for your camping stove. Unless you are just having a short trip, you can never be too careful when it comes to fuel. Be sure to pack them in quality containers though and place markers on them. This should be done so that you don't get confused with the materials you bring. You don't want to confuse water and fuel accidently on the trip. Also make sure that they are properly sealed to avoid any leaks during the trip. These are serious fire hazards so be extra careful when handling them.
Lastly, it is also requested that outdoor campers leave the camp in the same condition before, if not better. This is more of a moral responsibility and sensitivity to other campers. Make sure that the fire is put out, and cover the area with soil once more. This may be getting redundant, but there is never enough warning when it comes to outdoor safety. You could opt to make a checklist of all the safety measures that you should take so you would remember all of them.
Slow Cooker Stuffed Peppers Recipe
If you love stuffed peppers, but don't have the time to prepare them the traditional way, you should try this recipe. It only takes a small amount of preparation, and then the slow cooker does the rest of the work for you.
Easy Slow Cooker Stuffed Peppers
1 box Spanish rice mix
1 pound ground turkey or ground beef
2 stalks celery, diced
1 medium onion, chopped
1 large egg, beaten
4 bell peppers
1 large can whole tomatoes, undrained
1 can condensed tomato soup
1 cup water
1/2 teaspoon ground black pepper
Cut bell peppers in half lengthwise. Remove seeds and core. Remove the seasoning packet from the Spanish rice mix and save to use later in the recipe.
Combine ground turkey or beef, rice mix, celery, onion, beaten egg and black pepper in a large bowl. Mix well. Divide into 8 equal portions. Fill each half of pepper with a single portion of the meat mixture.
Pour can of whole tomatoes into the slow cooker. Arrange filled bell pepper halves on top of tomatoes.
Combine tomato soup, rice mix seasoning and water in another bowl. Pour soup mixture gently over peppers. Cover.
Cook on LOW setting for 8 to 9 hours.
Tip: If you plan to allow this recipe to cook while you are away at work, prepare and refrigerate the meat mixture the night before. Fill the peppers and add the remaining ingredients in the morning. This will make preparation extremely quick, and you will have your evening meal cooking within a matter of minutes. When you arrive home from work, you will be greeted by a most delectable aroma.
Grilling Test On The Primo Kamado
Chef Tony puts the Primo Oval XL Kamado cooker to the test, with whole chickens, pork tenderloins, steak, and pizza to see how it will perform. He then shows you all of the important details on video to let you decide for yourself what you think of the Primo kamado. Hope you enjoy!
Chef's Choice Stainless Steel Egg Cooker
For More Info or to Buy Now: www.hsn.com The Chef's Choice Stainless Steel Egg Cooker's revolutionary "Vari-Cook" feature allows you to cook eggs to varying degrees of doneness in the same batch - each cooked to perfection. This is a... Prices shown on the previously recorded video may not represent the current price. View hsn.com to view the current selling price. HSN Item #240821
Dragons Den Peter Hopton Very PC Epic Fail PT1
Peter Hopton of Very PC fails miserably in the Dragons Den.
Grill ceramiczny - Big Green EGG od FOODLOVERS.PL
Big Green Egg z USA. Grill ceramiczny dostępny w różnych rozmiarach, tzw. "komodo cooker". Ten wyjątkowy grill zapewni wyśmienitą jakość przygotowywanych potraw, wyróżni się u Państwa w ogrodzie lub na tarasie. Big Green Egg może służyć jako grill, wędzarnia czy piekarnik, można go używać przez cały rok. • ceramika zapewni równomierny rozkład temperatury • jest bardzo wydajny, zużywa małe ilości węgla drzewnego • można używać podczas mrozów lub deszczu • jest bezpieczny, nie nagrzewa się od zewnątrz • elegancki i niepowtarzalny design • dostępne akcesoria (półki, stelaże i płyty do pieczenia, pokrowiec i inne) więcej na www.foodlovers.pl
" Jollof Rice " W African Dish - Bajias Cooking
For rice 2ts salt, 4cup basmati rice, 3ts ajinomoto, ¾ cup tomato paste, 3habanero chili grind together with little water half for curry half for rice. 2 onions, 5magi beef stock. Pink onions then add all, add 5 ½ cup water for rice cooker and add rice. For curry 1ts salt, 1ts ajinomoto, 5 beef stock cubes, 2 onions, 2-3 eggplants, fresh thyme 1 can backed beans. Slice egg plant thinly soak them in water for a while then squeeze. Fry them together with 2 onions till pink. Then add all stir for 4-5 min then add chicken, when its cooked add thyme + backed beans. Deep fry potatoes to add at the end. DO NOT use dried thyme available in the market otherwise you will end up with the cent of KAFOOR in this dish. Fresh can be frozen and used. Jollof Rice is a major staple dish originating from the Wolof/Jollof people of W Africa Sierra Leone Senegal and Gambia.
All American Canner Cooker Reviews
Canning is a time honored way of preserving food from your garden and becoming more self sufficient. In modern times, canning has become less popular although at one time it was routinely done so families would have food to carry them through the winter. There are still many families carrying on this tradition and one of the most popular brands of home canners they use is All American.
All American 25 Quart Home Canner
Canning food requires the proper equipment. A pressure cooker is required in order to create intense heat that kills bacteria. If you just put fruits and vegetables in jars, they will quickly spoil. When a home canner is used, the bacteria are killed and the jars are sealed so food has a long shelf life.
The All American pressure cooker heats and seals the food so when you open it several weeks or months later, it will be safe to eat. It does this by heating under pressure. This can cause inferior quality canners to break down after a few uses. The All American is durable and well built. It stands up to wear and tear and has no gaskets that will crack. The canner is an attractive addition to your kitchen as well being made from stainless steel and having a satin finish.
The All American Canner Cooker 21 1/2 Quart
This canner is built just as well and does the job just as well as the larger version. This one is just a little smaller. It holds up to seven quart jars or nineteen pint jars at a time. It costs a little less too so it is the perfect choice for the average home canner.
Pressure cookers, or home canners, are essential equipment if you want to can your own food. Canning is one of the best and easiest methods for preserving food. It has withstood the test of time and has many advantages over other methods. The All American brand canners are among the most durable and reliable and are always a good choice and this is reflected in the many good user reviews they have received.
There are a few safety precautions you must keep in mind when using a home canner. These are common sense but you should familiarize yourself with them by referring to the owner's manual before using your canner for the first time. If you buy a used pressure cooker and don't have access to the manual, then you can find the information you need on the All American website. If you use your home canner properly and take care of it, it will last you for several years.
Get Started With Home Baking - Monkey Bread
While they take some time, yeast-raised breads are versatile and delicious. Great to eat alone, or with soup or stew, homemade breads can help you save money and eat healthier. Baking bread is also a great way to express your creativity in the kitchen..
A leisurely Saturday or Sunday afternoon is a perfect time to practice some new cooking skills (recipe follows), then sit with a cup of coffee or tea as you relax and enjoy the results.
Baking tips for yeast breads:
Allow plenty of time to make a yeast bread recipe, as you may have to allow for a first and second rise.
Check the date and make sure you are using fresh yeast.
Scald the milk to deactivate enzymes that interfere with rising.
Roll up your sleeves and enjoy the kneading process. It is a great way to work off some stress.
Select the right size baking dish, as called for in the recipe. Ceramic, glass and metal ovenware is widely available.
Bake your bread with the oven rack set in the center position.
Grease or oil the baking dish with baking spray, or light vegetable oil.
Classic American and many international cuisines are full of fantastic bread recipes, waiting for home bakers to explore, in hundreds of sweet or savory versions.
Monkey Bread Recipe
Sweet bread recipes like this are also called bubble bread, because you form it into balls before the second rising. When you eat it, the pieces pull apart easily. Fun to make and delicious to eat, for young and old alike.
1 c. milk, scalded
1/2 c. sugar
1 t. salt
2 packages dry baking yeast
2 eggs, beaten
4 1/2 c. all-purpose flour
1 stick butter
1 c. white sugar
1 T. cinnamon
1/2 c. pecans or raisins (optional)
Mix the first three ingredients above in a saucepan, heat until it begins to simmer, then remove from heat and cool to lukewarm. This step is needed to deactivate enzymes in the milk that will interfere with the yeast. The mixture also needs to cool so as not to kill the yeast.
When mixture has cooled to lukewarm, add the yeast and eggs, then most of the flour. Knead about 10 minutes, until the dough makes a smooth ball and is elastic but not sticky. Add the last cup of flour gradually as you knead, as humidity influences how much flour the dough will take up. Better to add flour repeatedly, a little at a time, than to add too much. The dough should be satiny and stick to itself but not your hands or work surface.
Place dough ball in a large buttered or greased bowl, cover with a clean dish towel and place in a warm place to rise until doubled in bulk, about an hour.
Meanwhile, prepare an angel food cake pan by spraying with baking spray, or greasing with butter or shortening. Set aside.
When dough has risen, punch down in the center and let it rest for 10 minutes.
While dough is resting, melt butter in a small pan. Separately, in a wide, shallow bowl, mix the cup of sugar, cinnamon and nuts or raisins if you are using them.
Pull out small pieces of dough and roll them into the size of a walnut, about 1 1/2 inch in diameter. Roll in the melted butter, then in the sugar mixture. Place each ball in the prepared cake pan, staggering the rows. When all the dough has been added, cover the cake pan with the dish towel and set again in a warm place to rise for about half an hour, until doubled.
Preheat oven to 350 degrees. Bake for about 45 minutes, until cake tester comes out clean.
Allow bread to cool in pan for about 15 minutes, then use a long knife to loosen the sides. Place a large plate on top and invert the pan over the plate to remove the bread. Serve warm.
Learn to bake yeast breads and a wonderful world of baking will be yours to explore. Loaves of all shapes, dinner rolls and pizza crusts and are just a few of the variations that will be ready for a delicious adventure once you learn the basic techniques needed to make this bread.
Eggplant Sushi
Sushi has been a Japanese delicacy for centuries and was originally intended to preserve fermented fish. Nowadays, sushi bars (famous for its conveyor belts) have become upscale restaurants in high-class cities. But, you don't need to be upper crust to enjoy this simple Japanese meal. You only need to know how to make sushi.
There are many sushi-making kits out there with their own how-to books and guides. Find a book with simple recipes that a beginner can try out. You'll be surprised to see how many simple dishes there really are.
The ingredients are not many. You only need rice (Japanese is the best bet, since they have a unique consistency can hold the sushi together), rice vinegar, sugar, salt, nori (seaweed) and toppings of your choice (eggs, cucumbers or crabsticks).
First, you will have to cook the rice. Most brands actually give instructions at the back of the packet, but in case they don't, here are some pointers. You cook the rice the normal way by rinsing it with cold water and cook in a rice cooker. What's important is to dissolve the vinegar, salt and sugar in a pan under low heat for a few minutes before letting it cool in a bucket of ice. Add the mixture into the cooked rice a little at a time. While doing that, you need to 'fold' the rice with a spatula without squishing them. It is ready when there is a shine to the grains.
The next part requires a bit of creativity. Spread the rice on a large piece of seaweed, which in turn is placed on a sushi mat. Add your toppings on the rice and start rolling! You may not get it right the first time, but that's how you make sushi. You rarely get it right the first time.
A delicious topping for sushi is eggplant. This fruit (yes, it is actually a fruit), comes in many shapes and sizes, the most common one being purple and long. It can also be cooked in many ways, from being sautéed, char-boiled and even pickled. If you want to make it as a sushi topping, you will have to know how to cook an eggplant.
The Japanese usually pickle this delicacy and make them into tempura. It is best to serve them raw, with a little lemon juice to prevent browning, if you want it to be part of a sushi roll. You can also, grill these beauties on a searing hot grill for a smokier flavor. For those stir-fry nuts, cubed eggplants can be added to a hot wok with salt, garlic and red chilies.
Whatever way you cook it, eggplant will always taste good, especially if it is in a roll of Japanese rice and nori.
sandwich maker recipes italian christmas cookies Peanut Brittle
Electric Egg Cooker in Dragon's Den. Hilarious!
Haven't seen it in the shops yet, but this inventor is gonna get rich; maybe not for the egg cooker itself but for the wrap-around heating element. www.eggxactly.com
Facts and Tips on Steam Egg Cookers
With the birth of egg cookers, many deem it as a nutritional way of cooking egg in a matter of minutes. Hence, these egg cookers are actually made based on the steam cooking concept. It eliminated the use of fatty oils.
There are those that are actually marked with only three levels. The water level decides the type of egg you will boil, if it is soft-, medium- or hard-boiled. If there are no marked levels inside the egg cooker, there is a measuring cup provided so that you can fill it up with the right amount of water.
With egg cookers, you only need to fill its base with water, place the eggs inside the tray, close the lid of the cooker, and then turn on the button. When the water boils, it is the steam formed inside the egg cooker that can cook the egg just the way you like it. With steam and the fact that it is cooked in a closed container, you are assured that the nutrients of the egg is restored.
Maintaining Steam Egg Cookers
Since many families use steam egg cookers almost every day, it is important that you care for this appliance. You need to clean it after every use. You initially need to unplug the unit as well as the power cord, allow it to cool down, and then, proceed with the cleaning process. You need to wash the important components like the cooking tray, poaching tray, lid, egg pan, egg ring and service pan.
Wash these ideally with hot and soapy water. Allow air drying. You can also scrape-off its platen surface. If there are residues, make sure that you remove it. Then, using a damp "grill" cloth, wipe your entire egg cooker as well as its platen surface.
After this, wet a paper towel using 1 tbsp white vinegar. Wipe it to clean the heating plate. It takes out all the mineral deposits and impurities left behind, also acting as a good antibacterial agent. You can do this regularly because using merely soap and water can still cause mineral build-up, leading to discolored egg shells. However, the color never affects the eggs flavor and taste.
The more popular egg cooker brands are Krups, Oster, Cuisinart, Chef's Choice, West band, Maverick and Nordic Ware.
Here is a delicious and nutritious breakfast you can serve using hard-boiled eggs:
Creamed Eggs with Ham
Ingredients:
¼ c green onion, sliced
1 c ham, cooked and cut into julienne strips
¼ c green bell pepper, chopped
¼ c red bell pepper, chopped
4 hard-boiled eggs, sliced
2 tbsp flour
2 c milk
1 ½ c asparagus, cooked and cut to 1in/pc
Cooked rice (hot) or puff pastry shells (baked)
Procedure:
1. Using a large skillet, place it on top of medium-high heat.
2. Put some margarine or butter. When it is already hot, cook some ham until it becomes lightly brown.
3. Add the bell peppers and onion, stirring intermittently.
4. Once the vegetables become tender, you can add the flour and continue stirring.
5. Once the flour is absorbed completely, showcasing a smooth mixture, you can now remove the pan from the stove.
6. Pour some milk, small amounts at-a-time while still stirring it constantly.
7. Once it becomes smooth and thick, add the asparagus and eggs. Place them onto the skillet, and then, reheat it.
8. You can serve this with puff pastry shells or cooked rice.